Articles
Using filters for navigation and sharing
3 min read
CloudShark’s display filters are 100% compatible with the Wireshark filters used in packet analysis. With CloudShark, they present a new opportunity for use when sharing your captures with colleagues in order to both present the view you are looking at, or to help navigate to a section of the capture you want them to see. Here’s some tricks we use when getting around town in CloudShark.
Filter based on capture content
If you know there’s something in the capture you’re looking for immediately, and you want others to see what you’re thinking, you can use the filter ‘frame contains’ to search for a literal string that exists in the capture. Here’s a capture of one of us browsing www.cloudshark.org. We know that’s what we’re looking for, so we use the filter ‘frame contains cloudshark’, which returns to us only those packets that contain the word ‘cloudshark’ in their payloads. Take a look at the capture here:
Notice that the URL includes the filter expression (formatted as a URL). This means whomever you share that link with will see what you see.
Filter based on capture number using a range
Sometimes CloudShark can be loading a lot of packets, and you want to start somewhere deep in the list. Some of our users get around this by using a filter range based on the packet number. Rather than scrolling through the entire set of packets, we can filter out a range using ‘frame.number >= 140 && frame.number <=180’.
Filtering based on a range of packets
Using links embedded in annotations
You’ve used an annotation to point something out, but did you know you can embed links in them too? Since the annotations use markdown syntax, you can use the same notation you use on, say, reddit.com, to create them including adding links. Links are made by using an [ open bracket and a ] closed bracket around the text you want to be the link, immediately followed by an ( open parenthesis and a ) closed parenthesis containing the URL you want to link. Since everything in CloudShark can by built as a URL, this allows you to link to other analysis tool views from the annotations.
In our example, you probably already saw the annotation we added to one of the DNS responses. As you can see, the annotation includes a link to the DNS response metrics for the capture. Notice the URL there too!
Exporting filtered packets into a new capture
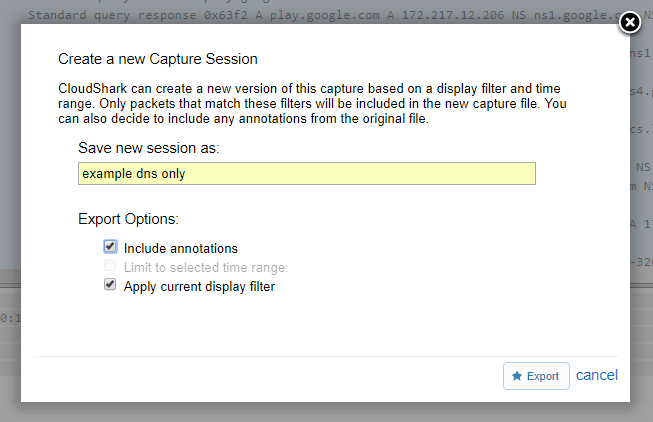
Lastly, if you’re currently looking at the filtered packets you want to see, you can use the “Export” tool to create a new capture with only those filtered packets. This is useful for trimming down very large captures, or for passing on only those packets that you want someone else to see. This also makes it easier for collaborators to work on the packets of interest, since they can then add their own filters without worrying about combining it with an existing filter.

That’s just a few of the ways that filters can make navigation easier in CloudShark. You can learn more about building Wireshark filters here.
Want articles like this delivered right to your inbox?
No spam, just good networking